
CentOS 7をminimalインストールした環境にZabbix Proxy をインストールからコンソール画面が表示されるまでの手順を書きました。
データベースには『MariaDB』を利用してインストールを行っています。
OSのアップデート
CentOSのインストール後にyum updateでOSを最新の状態にしておきます。
# yum update -yアップデート後にはOSの再起動を行いアップデートしたパッケージやカーネルを反映させます。
# rebootfirewalldとSElinuxの無効化
次にfirewalldとSElinuxの無効化を行います。
# systemctl stop firewalld
# systemctl disable firewalld
# setenforce 0
# vi /etc/selinux/config
SELINUX=enforcing
↓
SELINUX=disabled
Zabbix Proxyのインストール
Zabbix repositoryのインストール
# rpm -Uvh https://repo.zabbix.com/zabbix/5.0/rhel/7/x86_64/zabbix-release-5.0-1.el7.noarch.rpm
https://repo.zabbix.com/zabbix/5.0/rhel/7/x86_64/zabbix-release-5.0-1.el7.noarch.rpm を取得中
警告: /var/tmp/rpm-tmp.wiv6wn: ヘッダー V4 RSA/SHA512 Signature、鍵 ID a14fe591: NOKEY
準備しています...              ################################# [100%]
更新中 / インストール中...
   1:zabbix-release-5.0-1.el7         ################################# [100%]
必要なパッケージのインストール
Zabbix ProxyとデータベースおまけでZabbix Agentのインストールを行います。
# yum install -y mariadb-server zabbix-proxy-mysql zabbix-agentデータベースのrootパスワードの設定と設定ファイルの編集
はじめにmaradbサービスの起動と自動起動の設定を行います。
# systemctl start mariadb
# systemctl enable mariadb
my_secure_installationを使用して設定を行っていきます。
今回rootアカウントに設定するパスワードは”P@ssw0rd”としています。
 mysql_secure_installation

~~~
NOTE: RUNNING ALL PARTS OF THIS SCRIPT IS RECOMMENDED FOR ALL MariaDB
      SERVERS IN PRODUCTION USE!  PLEASE READ EACH STEP CAREFULLY!

In order to log into MariaDB to secure it, we'll need the current
password for the root user.  If you've just installed MariaDB, and
you haven't set the root password yet, the password will be blank,
so you should just press enter here.

Enter current password for root (enter for none):   【 Enterキー 】
OK, successfully used password, moving on...

Setting the root password ensures that nobody can log into the MariaDB
root user without the proper authorisation.

Set root password? [Y/n]  【 Enterキー 】
New password:             【 P@ssw0rd 】
Re-enter new password:    【 P@ssw0rd 】
Password updated successfully!
Reloading privilege tables..
 ... Success!


By default, a MariaDB installation has an anonymous user, allowing anyone
to log into MariaDB without having to have a user account created for
them.  This is intended only for testing, and to make the installation
go a bit smoother.  You should remove them before moving into a
production environment.

Remove anonymous users? [Y/n]   【 Enterキー 】
 ... Success!

Normally, root should only be allowed to connect from 'localhost'.  This
ensures that someone cannot guess at the root password from the network.

Disallow root login remotely? [Y/n]    【 Enterキー 】
 ... Success!

By default, MariaDB comes with a database named 'test' that anyone can
access.  This is also intended only for testing, and should be removed
before moving into a production environment.

Remove test database and access to it? [Y/n]    【 Enterキー 】
 - Dropping test database...
 ... Success!
 - Removing privileges on test database...
 ... Success!

Reloading the privilege tables will ensure that all changes made so far
will take effect immediately.

Reload privilege tables now? [Y/n]    【 Enterキー 】
 ... Success!

Cleaning up...

All done!  If you've completed all of the above steps, your MariaDB
installation should now be secure.

Thanks for using MariaDB!
~~~
設定ファイルの編集を行っていきます。
# vi /etc/my.cnf.d/server.cnf
~~~
[mysqld]

# this is only for embedded server
~~~
↓
~~~
[mysqld]
character-set-server = utf8
collation-server     = utf8_bin
skip-character-set-client-handshake
innodb_file_per_table

# this is only for embedded server
~~~
設定ファイルの編集後、データベースの再起動と自動起動を行います。
# systemctl restart mariadb
# systemctl status mariadb
初期データベースの作成
Zabbix Proxyのデータベースの作成と接続するアカウント、パスワードの設定を行っていきます。
# mysql -uroot -p
Enter password:
MariaDB [(none)]> create database zabbix_proxy character set utf8 collate utf8_bin;

MariaDB [(none)]> create user zabbix@localhost identified by 'zabbixpass';

MariaDB [(none)]> grant all privileges on zabbix_proxy.* to zabbix@localhost;

MariaDB [(none)]> quit
# zcat /usr/share/doc/zabbix-proxy-mysql-*/schema.sql.gz | mysql -uzabbix -p zabbix_proxy
Enter password:
Zabbix Proxy 設定ファイルの編集
最後にZabbix Proxyの設定ファイルの編集を行います。
編集箇所は『DBPassword』の項目になります。
# vi /etc/zabbix/zabbix_proxy.conf
ProxyMode=0
↓
ProxyMode=1
Server=127.0.0.1
↓
Server=192.168.1.101
# DBPassword=
↓
DBPassword=zabbixpass
Zabbix Proxyの設定ファイルの初期設定ではデータベースが『zabbix_proxy』、ユーザ名が『zabbix』に指定されています。
データベースの作成時に『zabbix_proxy』、ユーザ名を『zabbix』以外で作成する場合は
『DBName =』『DBUser=』の項目もあわせて編集する必要があります。
# ConfigFrequency=3600
↓
ConfigFrequency=60
初期値では1時間間隔でZabbixサーバーとプロキシの設定の同期を行います。
さすがに長すぎるので5分間隔に変更しています。
Zabbix Serverの設定変更
【おまけ】Zabbix Agent設定ファイルの編集
おまけでZabbix Agentの設定ファイルの編集も行っていきます。
今回Zabbix Serverは『192.168.1.101』になります。
↓で紹介している『Hostname』の項目はコンソールでホスト作成を行う際に指定するものとなります。
# vi /etc/zabbix/zabbix_agentd.conf
Server=127.0.0.1
↓
Server=192.168.1.101

ServerActive=127.0.0.1
↓
ServerActive=192.168.1.101

Hostname=Zabbix server
↓
Hostname=Zabbix proxy
# systemctl start zabbix-agent
# systemctl enable zabbix-agent
コンソールへZabbix Proxyサーバの登録
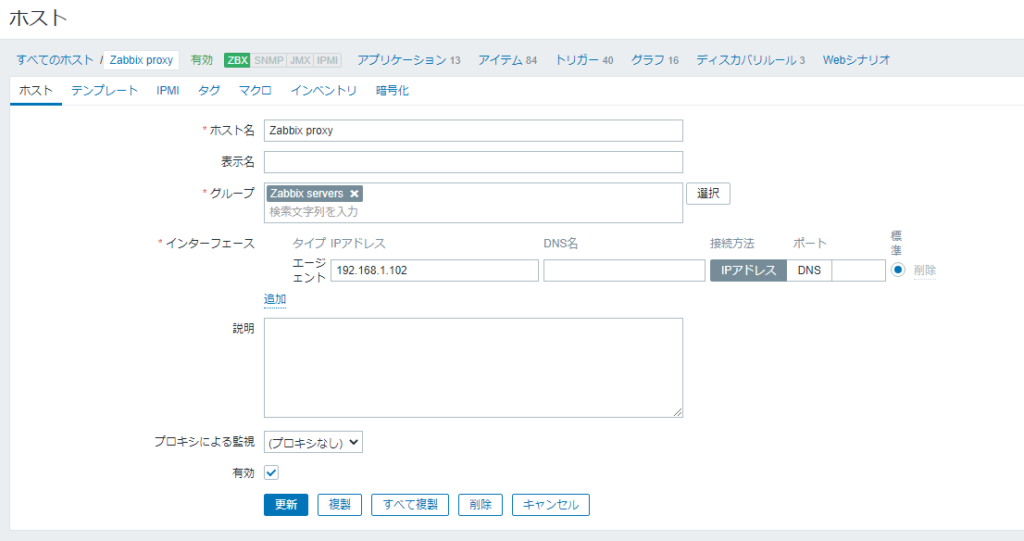
Zabbix Serverのコンソールへログインしホストの作成を行います。
ホスト名に項目には設定ファイルの『Hostname』で指定した項目を指定してあげます。
テンプレートの割り当てを行っていきます。
お好みですが『Template App Zabbix Proxy』と『Template OS Linux by Zabbix agent』を指定してあげればOKです。
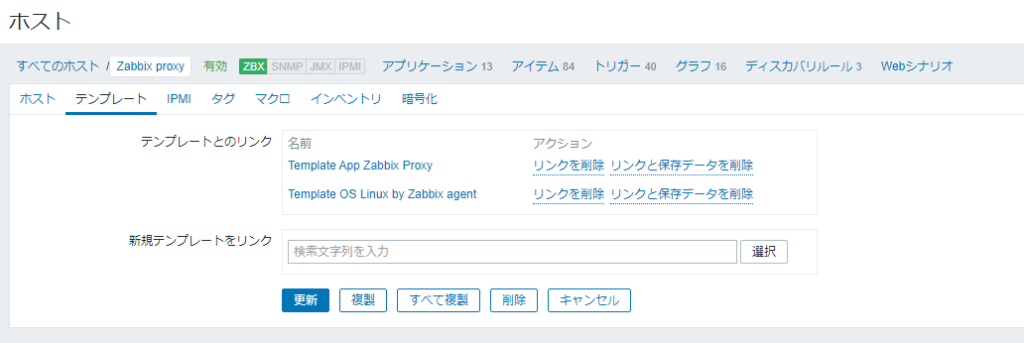
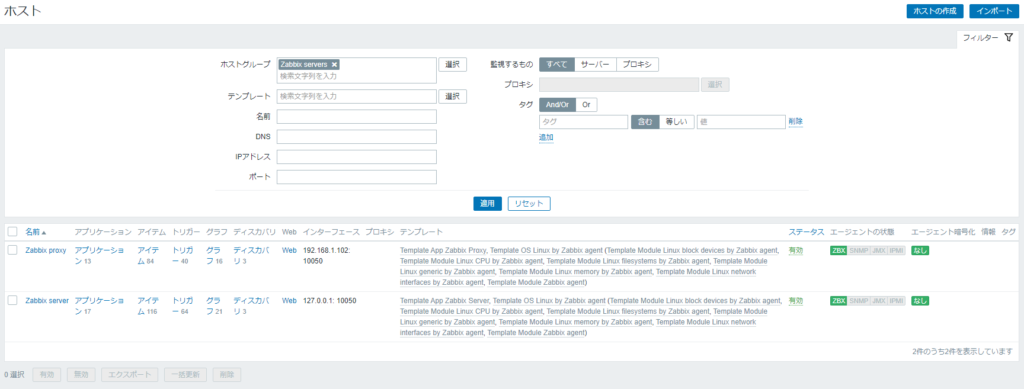
テンプレート割り当て後「エージェントの状態」が緑色になることを確認します。
Zabbixコンソールへプロキシの登録
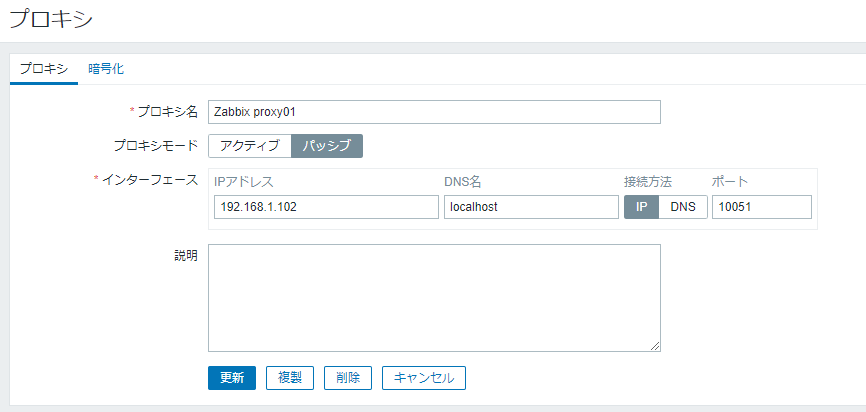
Zabbixのコンソールへログインし『管理』-『プロキシ』-『プロキシの作成』をクリックします。
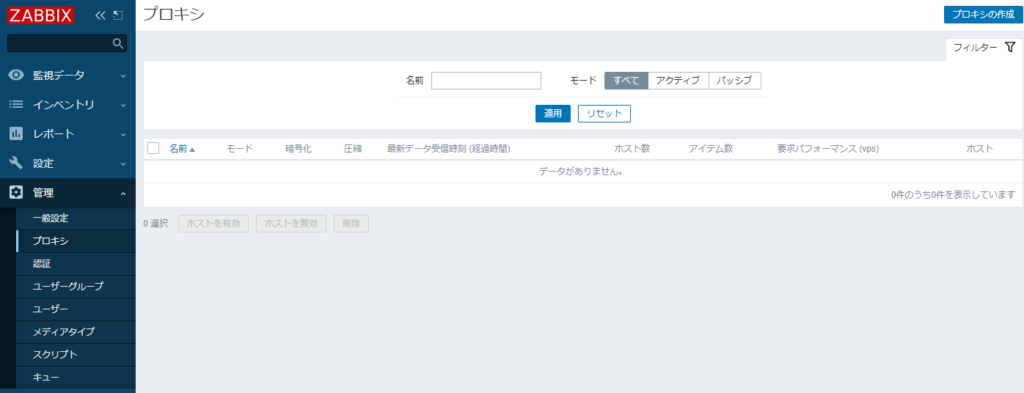
プロキシモードを『パッシブ』に変更し、プロキシ名とプロキシのIPアドレスを入力し『追加』をクリックします。
プロキシ経由で監視するホストを選択し「プロキシによる監視」の項目を変更し『更新』をクリックします。
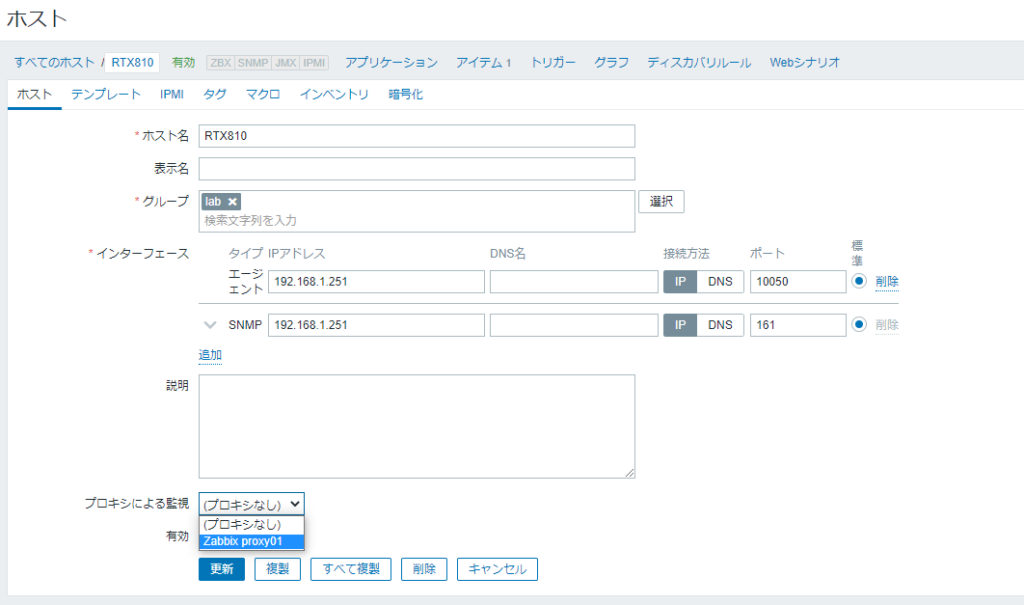
これで完了です!


コメント