目次
はじめに
CentOS 7をminimalインストールした環境にZabbix 5.0 をインストールからコンソール画面が表示されるまでの手順を書きました。
利用するパッケージとして『MariaDB』『NGINX』を利用してインストールを行っています。
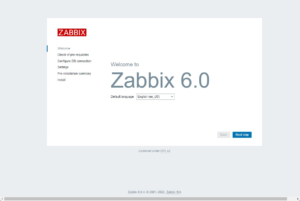
☆6.0が正式リリースされたのでインストールした時の記事はこちら↓
Zabbix 4.0の時と違ってWebサーバのインストールする手順が変わっていましたので導入時は注意してください。
参考にしたサイト
ダウンロード
Zabbix is being downloaded over 4 000 000 times every year for a reason. Download Zabbix for free and try it yourself!
参考になる本
Zabbixのバージョンが古いですが、初めて触る人にはおすすめな本!
とりあえず動く状態までは持っていけます。
Kindle限定ですが、無料で読むこと可能です!
インストールする環境
- OS:CentOS Linux release 7.8.2003 (Core)
- minimalインストール
- データベース:MariaDB
- Webサーバ:NGINX
- IPアドレス:192.168.1.101
- データベースのログインアカウント
- root / P@ssw0rd
- zabbix / zabbixpass
事前作業
# systemctl stop firewalld
# systemctl disable firewalld
# setenforce 0
# vi /etc/selinux/config
SELINUX=enforcing
↓
SELINUX=disabled
# yum update -y
Zabbix ServerとZabbix Agentのインストール
# rpm -Uvh https://repo.zabbix.com/zabbix/5.0/rhel/7/x86_64/zabbix-release-5.0-1.el7.noarch.rpm
# yum clean all
# yum install -y zabbix-server-mysql zabbix-agent zabbix-web-japanese
DBのインストール
# yum install -y mariadb-server
# systemctl start mariadb
# systemctl enable mariadb
# mysql_secure_installation
~~~
NOTE: RUNNING ALL PARTS OF THIS SCRIPT IS RECOMMENDED FOR ALL MariaDB
SERVERS IN PRODUCTION USE! PLEASE READ EACH STEP CAREFULLY!
In order to log into MariaDB to secure it, we'll need the current
password for the root user. If you've just installed MariaDB, and
you haven't set the root password yet, the password will be blank,
so you should just press enter here.
Enter current password for root (enter for none): 【 Enterキー 】
OK, successfully used password, moving on...
Setting the root password ensures that nobody can log into the MariaDB
root user without the proper authorisation.
Set root password? [Y/n] 【 Enterキー 】
New password: 【 P@ssw0rd 】
Re-enter new password: 【 P@ssw0rd 】
Password updated successfully!
Reloading privilege tables..
... Success!
By default, a MariaDB installation has an anonymous user, allowing anyone
to log into MariaDB without having to have a user account created for
them. This is intended only for testing, and to make the installation
go a bit smoother. You should remove them before moving into a
production environment.
Remove anonymous users? [Y/n] 【 Enterキー 】
... Success!
Normally, root should only be allowed to connect from 'localhost'. This
ensures that someone cannot guess at the root password from the network.
Disallow root login remotely? [Y/n] 【 Enterキー 】
... Success!
By default, MariaDB comes with a database named 'test' that anyone can
access. This is also intended only for testing, and should be removed
before moving into a production environment.
Remove test database and access to it? [Y/n] 【 Enterキー 】
- Dropping test database...
... Success!
- Removing privileges on test database...
... Success!
Reloading the privilege tables will ensure that all changes made so far
will take effect immediately.
Reload privilege tables now? [Y/n] 【 Enterキー 】
... Success!
Cleaning up...
All done! If you've completed all of the above steps, your MariaDB
installation should now be secure.
Thanks for using MariaDB!
~~~
# vi /etc/my.cnf.d/server.cnf
~~~
[mysqld]
# this is only for embedded server
~~~
↓
~~~
[mysqld]
character-set-server = utf8
collation-server = utf8_bin
skip-character-set-client-handshake
innodb_file_per_table
# this is only for embedded server
~~~
# systemctl restart mariadb
# mysql -uroot -p
Enter password: 【 P@ssw0rd 】
Welcome to the MariaDB monitor. Commands end with ; or \g.
Your MariaDB connection id is 2
Server version: 5.5.65-MariaDB MariaDB Server
Copyright (c) 2000, 2018, Oracle, MariaDB Corporation Ab and others.
Type 'help;' or '\h' for help. Type '\c' to clear the current input statement.
MariaDB [(none)]> create database zabbix character set utf8 collate utf8_bin;
Query OK, 1 row affected (0.00 sec)
MariaDB [(none)]> create user zabbix@localhost identified by 'zabbixpass';
Query OK, 0 rows affected (0.00 sec)
MariaDB [(none)]> grant all privileges on zabbix.* to zabbix@localhost;
Query OK, 0 rows affected (0.00 sec)
MariaDB [(none)]> quit
Bye
# zcat /usr/share/doc/zabbix-server-mysql-5.0.0/create.sql.gz | mysql -uzabbix -p zabbix
Enter password: 【 zabbixpass 】
# vi /etc/zabbix/zabbix_server.conf
# DBPassword=
↓
DBPassword=zabbixpass
Webサーバのインストール
# yum -y install centos-release-scl
# vi /etc/yum.repos.d/zabbix.repo
~~~
[zabbix-frontend]
・・・
enabled=0
・・・
~~~
↓
~~~
[zabbix-frontend]
・・・
enabled=1
・・・
~~~
# yum -y install zabbix-web-mysql-scl zabbix-nginx-conf-scl
# vi /etc/opt/rh/rh-nginx116/nginx/conf.d/zabbix.conf
~~~
server {
# listen 80;
# server_name example.com;
~~~
↓
~~~
server {
listen 80;
server_name 192.168.1.101;
~~~
# vi /etc/opt/rh/rh-php72/php-fpm.d/zabbix.conf
~~~
listen.acl_users = apache
~~~
↓
~~~
listen.acl_users = apache,nginx
~~~
~~~
; php_value[date.timezone] = Europe/Riga
~~~
↓
~~~
php_value[date.timezone] = Asia/Tokyo
~~~
# systemctl restart zabbix-server zabbix-agent rh-nginx116-nginx rh-php72-php-fpm
# systemctl enable zabbix-server zabbix-agent rh-nginx116-nginx rh-php72-php-fpm
Zabbixフロントエンドの設定
ブラウザから http://192.168.1.101/ へ接続
『Next step』をクリック
すべての項目が OK であることを確認し『Nest step』をクリック
『User:zabbix』『Password:zabbixpass』を入力し『Next step』をクリック
『Next step』をクリック
『Next step』をクリック
『Finishi』をクリック
コンソールの日本語化
『Username:Admin』『Password:zabbix』を入力し『Sign in』をクリック
画面左下の『User settings』をクリック
『Lamguage:Japanese』を選択
『Update』をクリック
日本後表記になることを確認
以上で作業完了です。お疲れ様した!(^^)!
コメント