
インストール作業の流れ
- 所要時間30分
- Zabbixサーバのインストール
- MariaDBのインストール
業務の関係でZabbixの運用について考える必要になったので、ナレッジとして掲載しています。
環境
- Windows 10へVMwarePlayerをインストールしVMwarePlayer上にLinuxをインストール
- OS:CentOS 7.8.2003(minimal インストール)
- Zabbix:Zabbix 4.0
- データベース:Mariadb 5.5
事前準備
はじめに、SELinuxの無効化、firewalldの無効化を行います。
セキュリティを意識した場合、無効にするのは良く無いですが、まずは起動させることを目標に進めていきます。
setenforce 0
vi /etc/selinux/config
---
"SELINUX=enabled"を
"SELINUX=disabled"へ変更し保存
---
systemctl stop firewalld
systemctl disable firewalld
Zabbix サーバとMariaDBのインストール
Zabbixサーバ、MariaDBのインストールを行います。
手順として大きく3つです。
- Zabbixレポジトリのインストール
- Zabbixサーバのインストール
- 使用するデータベース(本記事ではMariaDB)のインストール
rpm -ivh https://repo.zabbix.com/zabbix/4.0/rhel/7/x86_64/zabbix-release-4.0-2.el7.noarch.rpm
yum -y install zabbix-server-mysql zabbix-web-mysql zabbix-web-japanese
yum -y install mariadb-server mariadb
Zabbix サーバとMariaDBの初期設定
インストール後、初期設定を行っていきます。
- MariaDB
- 文字コードをUTF8に変更
- MariaDBの起動
- rootアカウントのパスワード設定
- データベースの作成と権限設定
- 作成したデータベースへZabbixのデータのインポート
- Zabbixサーバ
- Zabbixサーバの設定ファイル(zabbix_server.conf)へ作成したデータベースのパスワードの設定
- Zabbixサーバの起動
- Webサーバ
- phpのタイムゾーンの変更
- httpdの起動
vi /etc/my.cnf
********************************************************
"character-set-server=utf8"を[mysqld]セクション内に記載し保存
*******************************************************
---
[mysqld]
datadir=/var/lib/mysql
socket=/var/lib/mysql/mysql.sock
# Disabling symbolic-links is recommended to prevent assorted security risks
symbolic-links=0
# Settings user and group are ignored when systemd is used.
# If you need to run mysqld under a different user or group,
# customize your systemd unit file for mariadb according to the
# instructions in http://fedoraproject.org/wiki/Systemd

character-set-server=utf8

[mysqld_safe]
log-error=/var/log/mariadb/mariadb.log
pid-file=/var/run/mariadb/mariadb.pid

#
# include all files from the config directory
#
!includedir /etc/my.cnf.d
---
systemctl start mariadb
systemctl enable mariadb
mysql_secure_installation
********************************************************
Enterキーを2回
New password: 設定するパスワードを入力しEnter
Re-enter new password: 設定するパスワードを入力しEnter
Enterキーを4回
*******************************************************

NOTE: RUNNING ALL PARTS OF THIS SCRIPT IS RECOMMENDED FOR ALL MariaDB
      SERVERS IN PRODUCTION USE!  PLEASE READ EACH STEP CAREFULLY!

In order to log into MariaDB to secure it, we'll need the current
password for the root user.  If you've just installed MariaDB, and
you haven't set the root password yet, the password will be blank,
so you should just press enter here.

Enter current password for root (enter for none):
OK, successfully used password, moving on...

Setting the root password ensures that nobody can log into the MariaDB
root user without the proper authorisation.

Set root password? [Y/n]
New password:
Re-enter new password:
Password updated successfully!
Reloading privilege tables..
 ... Success!


By default, a MariaDB installation has an anonymous user, allowing anyone
to log into MariaDB without having to have a user account created for
them.  This is intended only for testing, and to make the installation
go a bit smoother.  You should remove them before moving into a
production environment.

Remove anonymous users? [Y/n]
 ... Success!

Normally, root should only be allowed to connect from 'localhost'.  This
ensures that someone cannot guess at the root password from the network.

Disallow root login remotely? [Y/n]
 ... Success!

By default, MariaDB comes with a database named 'test' that anyone can
access.  This is also intended only for testing, and should be removed
before moving into a production environment.

Remove test database and access to it? [Y/n]
 - Dropping test database...
 ... Success!
 - Removing privileges on test database...
 ... Success!

Reloading the privilege tables will ensure that all changes made so far
will take effect immediately.

Reload privilege tables now? [Y/n]
 ... Success!

Cleaning up...

All done!  If you've completed all of the above steps, your MariaDB
installation should now be secure.

Thanks for using MariaDB!
mysql -u root -p
Enter password: 前項で設定したパスワードを入力
********************************************************
DB "zabbix"、ユーザ"zabbix"を作成
ユーザ "zabbix"に対するパスワードは"zabbixpass"とします。
********************************************************

create database zabbix character set utf8 collate utf8_bin;
GRANT ALL PRIVILEGES ON zabbix.* TO zabbix@localhost IDENTIFIED BY 'zabbixpass';
quit
********************************************************
本時ではバージョン"4.0.20"としています。
インストール時のバージョンに合わせて"zabbix-server-mysql-4.0.20"を変更してください。
********************************************************
zcat /usr/share/doc/zabbix-server-mysql-4.0.20/create.sql.gz | mysql -uzabbix -p zabbix
Enter password: 前項で設定したパスワードを入力本記事では"zabbixpass"
vi /etc/zabbix/zabbix_server.conf
********************************************************
Zabbixサーバの設定ファイル(zabbix_server.conf)へ作成したデータベースのパスワードの設定します。
"DBPassword="を
"DBPassword=zabbixpass"へ変更
********************************************************
---
### Option: DBPassword
#       Database password.
#       Comment this line if no password is used.
#
# Mandatory: no
# Default:
# DBPassword=
DBPassword=zabbixpass
---
systemctl start zabbix-server
systemctl enable zabbix-server
vi /etc/httpd/conf.d/zabbix.conf
****************************************************************
"php_value date.timezone Asia/Tokyo"を<IfModule mod_php5.c>内へ記載
****************************************************************

---
    <IfModule mod_php5.c>
        php_value max_execution_time 300
        php_value memory_limit 128M
        php_value post_max_size 16M
        php_value upload_max_filesize 2M
        php_value max_input_time 300
        php_value max_input_vars 10000
        php_value always_populate_raw_post_data -1
        # php_value date.timezone Europe/Riga
        php_value date.timezone Asia/Tokyo
---
systemctl start httpd
systemctl enable httpd
Webインターフェースの設定
最後に初回アクセスWebブラウザから『http://zabbixサーバのIPアドレス/zabbix/』へ接続し設定を行います。
「Next step」をクリックします。

「Next step」をクリックします。
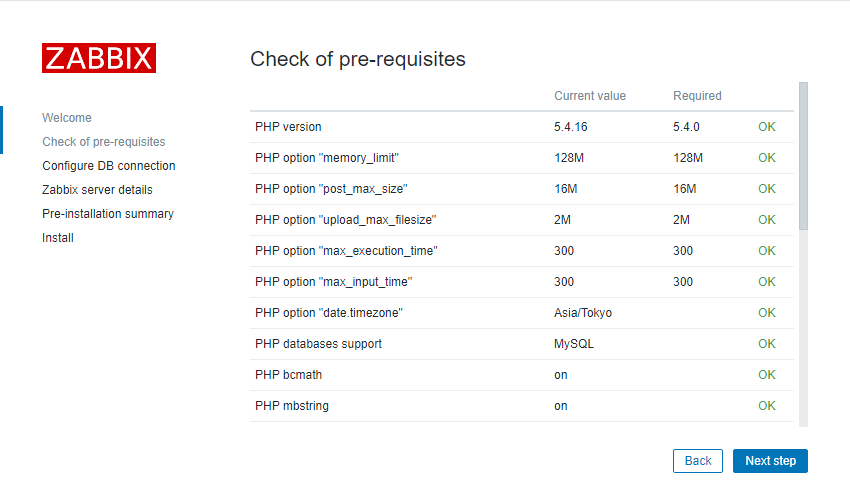
「Next step」がクリックできない場合はOKになっていない項目がある場合です。OKになっていない項目の見直しを行う必要があります。
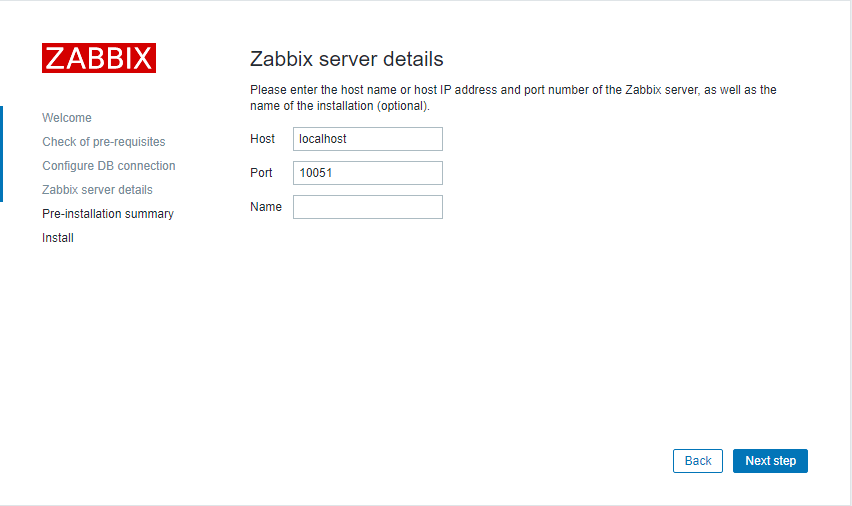
Passwordの項目に「zabbix_server.conf」に記載したパスワードを入力します。
入力後「Next step」をクリックします。

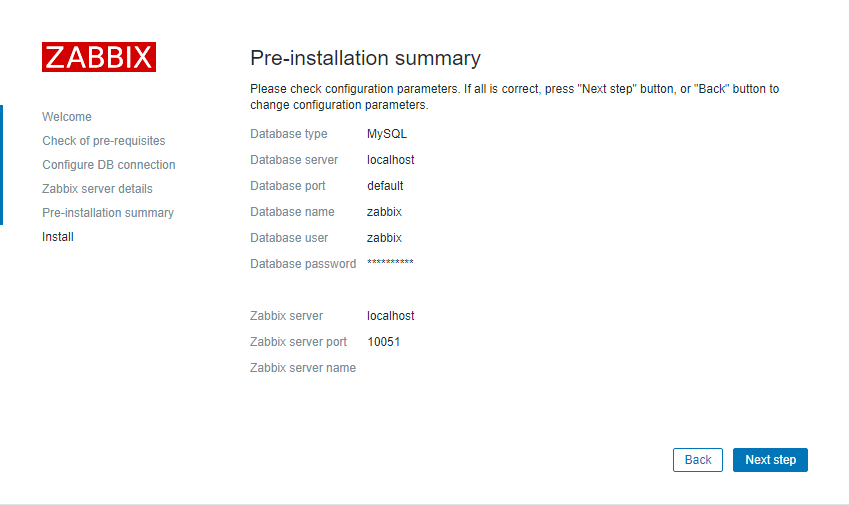
「Next step」をクリックします。
「Next step」をクリックします。
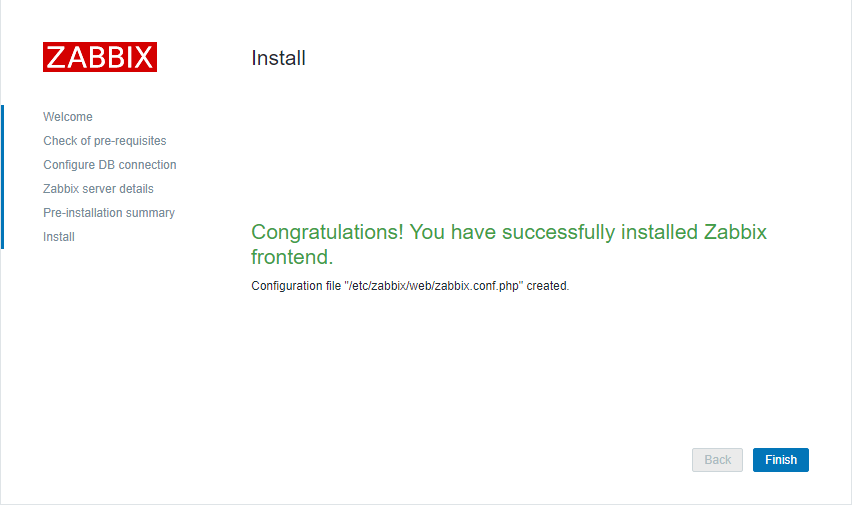
「Finish」をクリックします。
Zabbixコンソールへの接続と日本語化
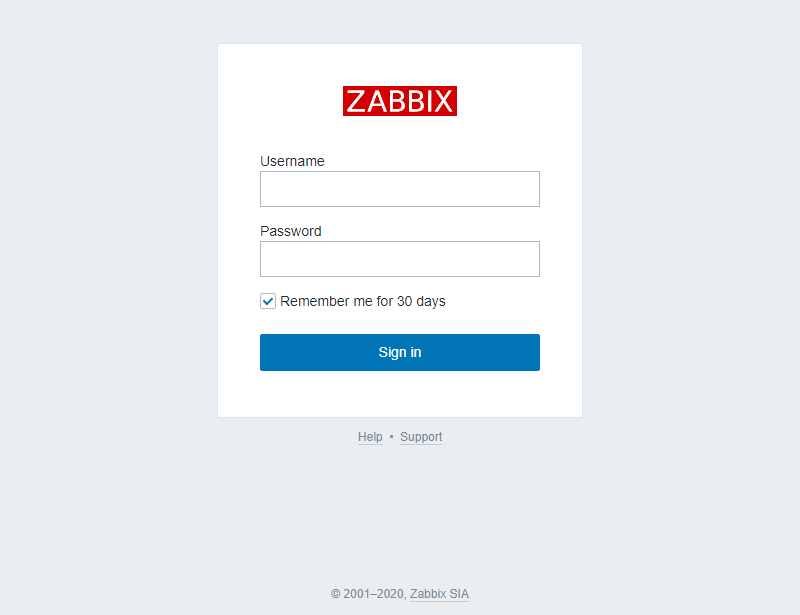
Webブラウザから『http://zabbixサーバのIPアドレス/zabbix/』へ接続するとログイン画面が表示されます。
下記アカウントでログインを行います。
- Username :Admin
- Password:zabbix
初期状態ではコンソールが英語となっています。
私は英語が苦手なので表示を日本語に変更します(-_-;)
コンソールへログインし右上の人型のアイコンをクリックします。

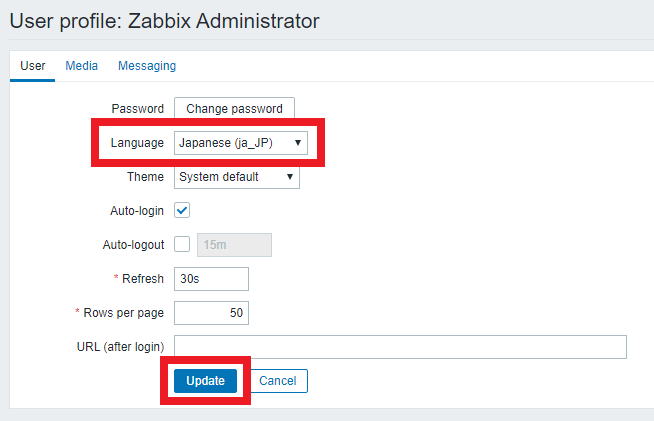
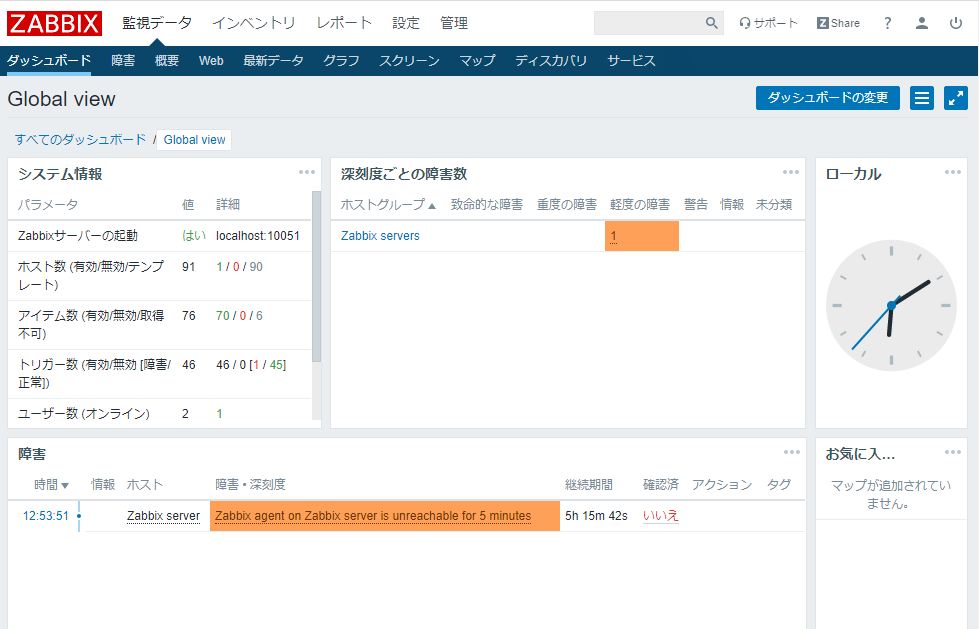
日本語表示されていることを確認します。
以上でZabbixのインストールは終了です。
お疲れさまでした(^^♪


コメント