お疲れ様です。satimoです。
タイトルの通りPythonの学習環境を自宅に用意したので紹介していきます。
本番利用時は今使っているPCに準備していきますが、初めての時にはPCを汚くしたくないので、仮想環境にWindows10を用意して動作できるかの確認をしていきます。
Pythonの学習環境の準備
仮想基盤の用意
今回自宅にあるVMWare ESXi上にWindows 10をインストールしていきます。
ESXiの環境構築はこちら↓の記事で紹介していますので参考にしてみてください。
自宅インフラ構築】Linux/Windowsサーバーの勉強環境を構築

Windows評価版のインストール
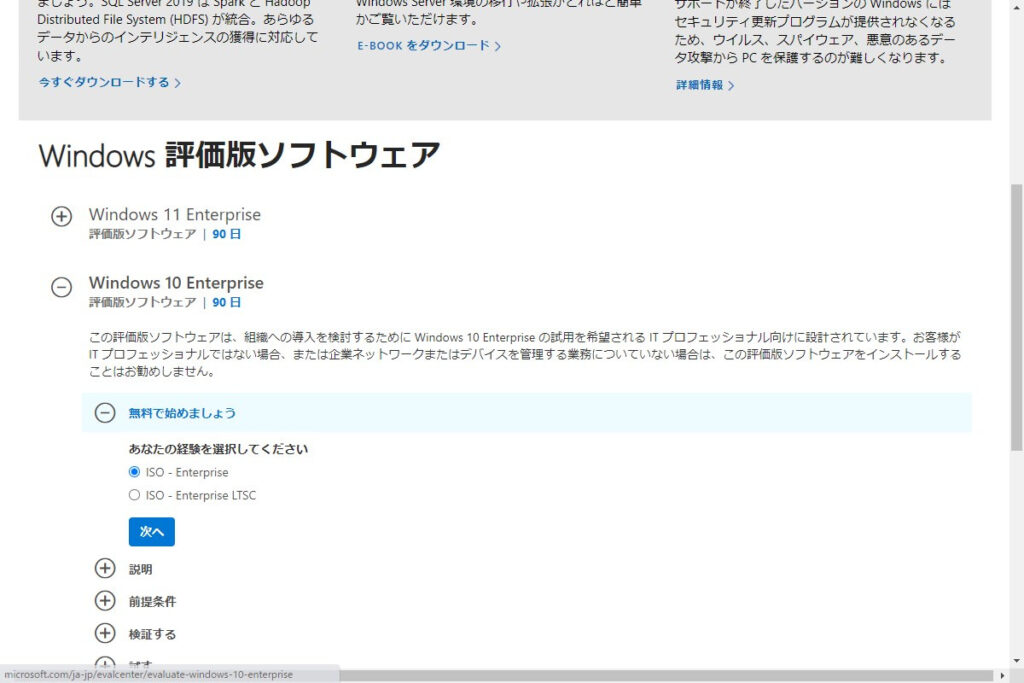
こちら↓のリンクからWindows 評価版のISOをダウンロードします。
https://www.microsoft.com/ja-jp/evalcenter/evaluate-windows-10-enterprise
『ISO – Enterprise』を選択して『次へ』をクリックします。
ダウンロード時には個人情報を入力しますので必要な項目を入力し『次へ』をクリックします。
[st-midasibox title=”ポイント” webicon=”st-svg-check-circle faa-ring animated” bordercolor=”#FFC107″ color=”” bgcolor=”#FFFDE7″ borderwidth=”” borderradius=”5″ titleweight=”bold” myclass=””]電話番号や、メールアドレスを入力する項目があります。
いつも会社の連絡先を登録して、何度もISOをダウンロードしていますが連絡がきたことは無いです。
[/st-midasibox]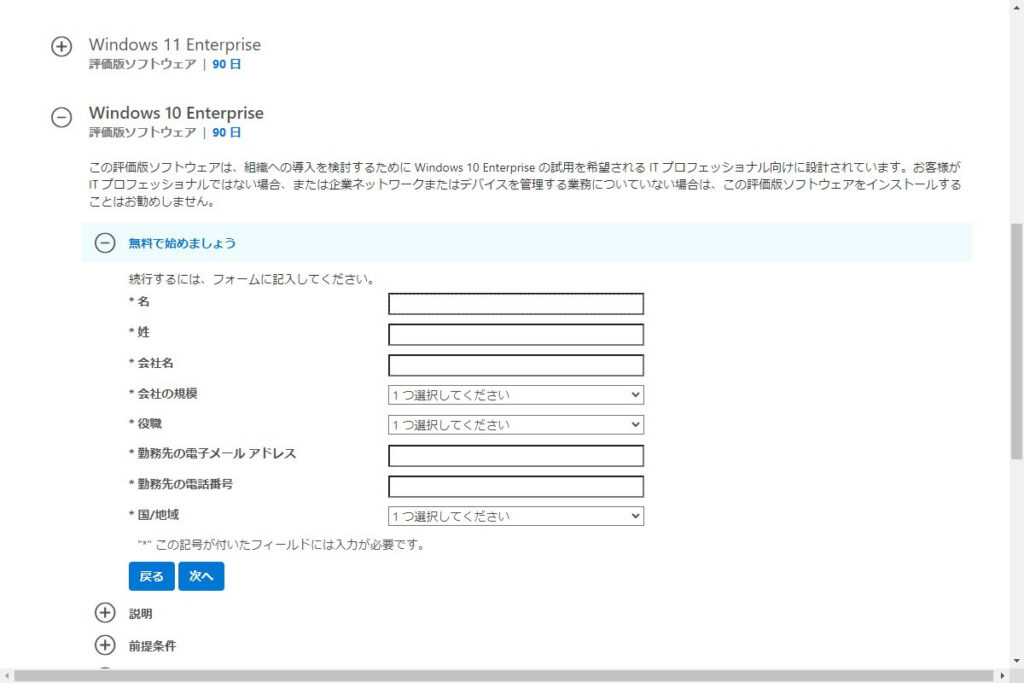
『64ビット』『日本語』を選択し『ダウンロード』をクリックします。
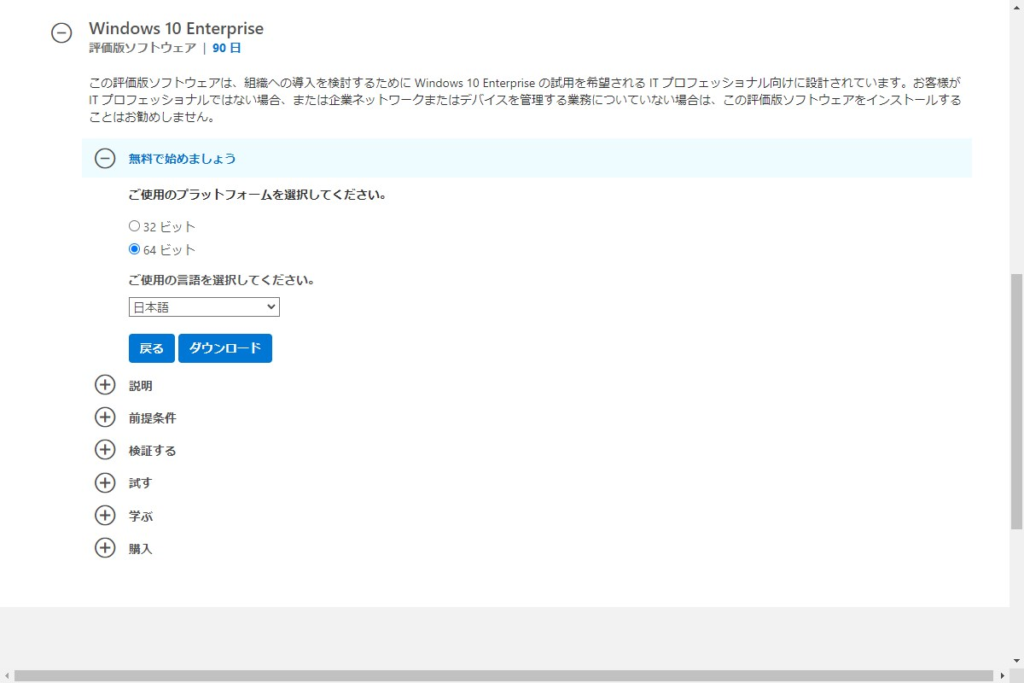
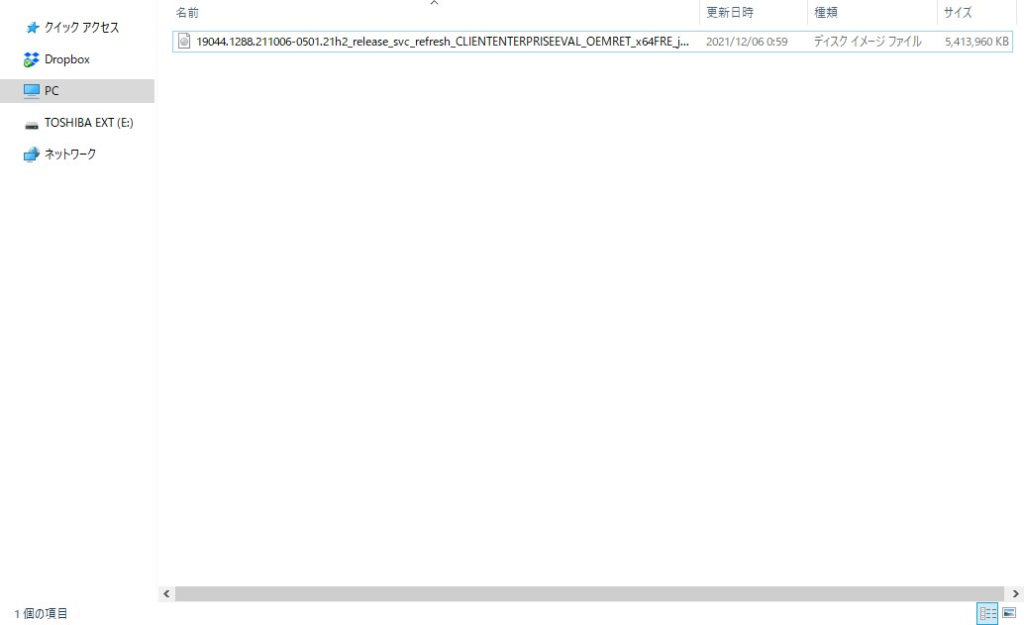
ダウンロードが完了すると約5.4GBのISOファイルがダウンロードされます。
Pythonの環境を用意
VMWare ESXi上にインストールしたWindows 10にPythonをインストールします。
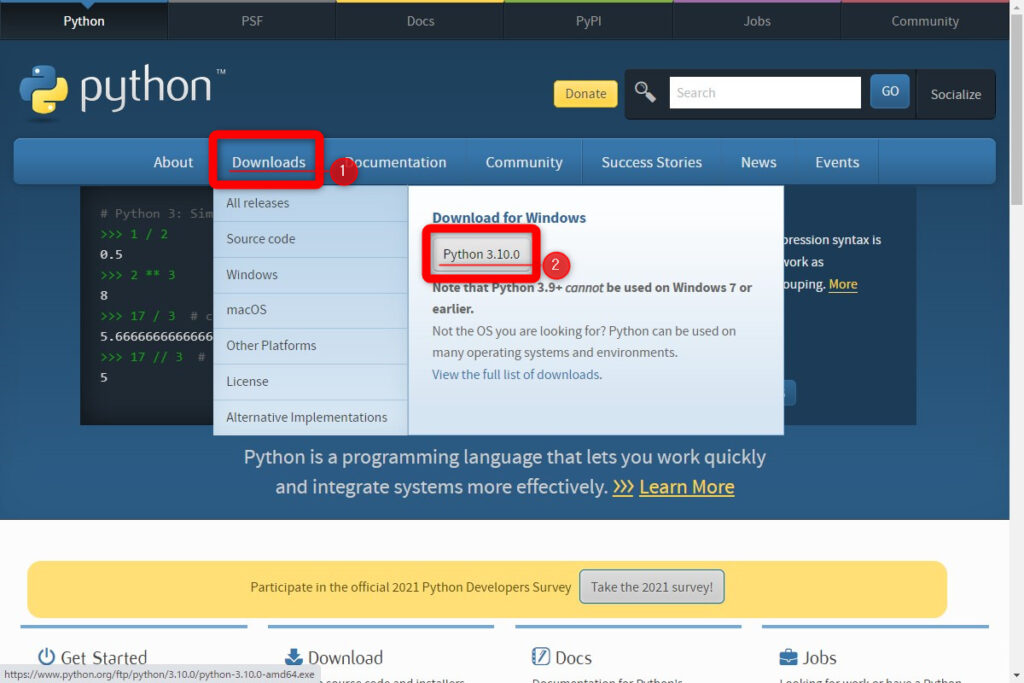
こちら↓のPythonの公式サイトにアクセスします。
ページが表示されたら『Downloads』-『Python x.x.x』をクリックします。
※②の部分はアクセスしたときによってバージョンが異なります。
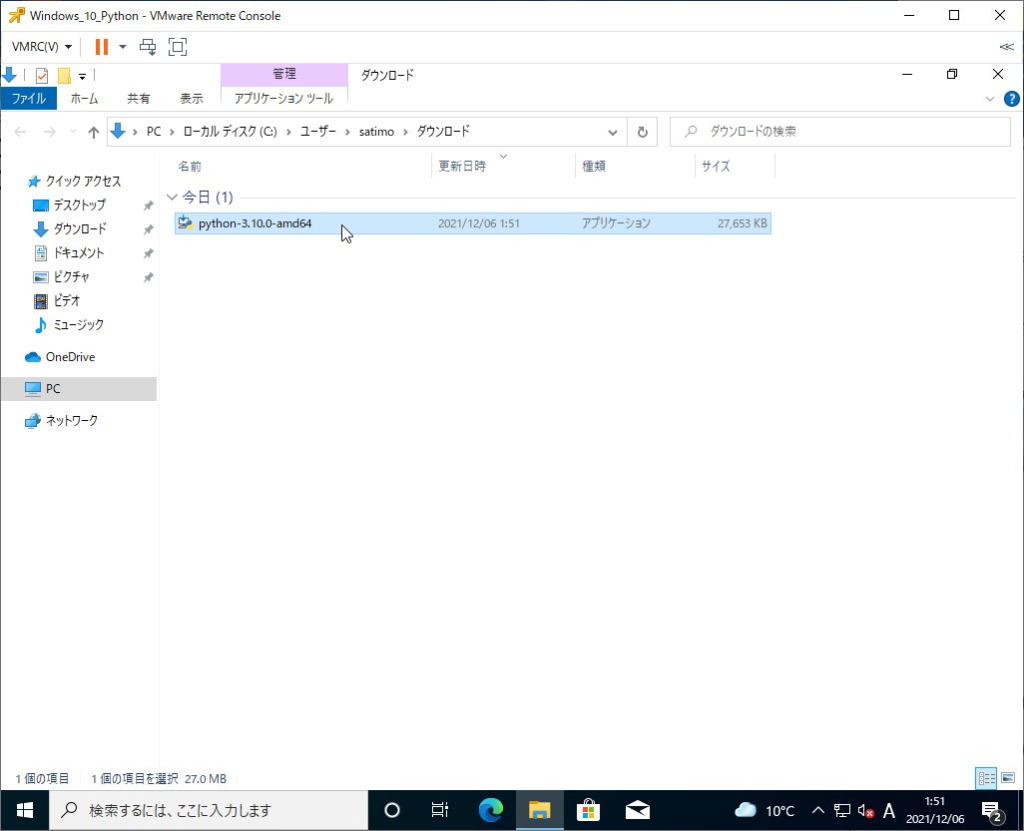
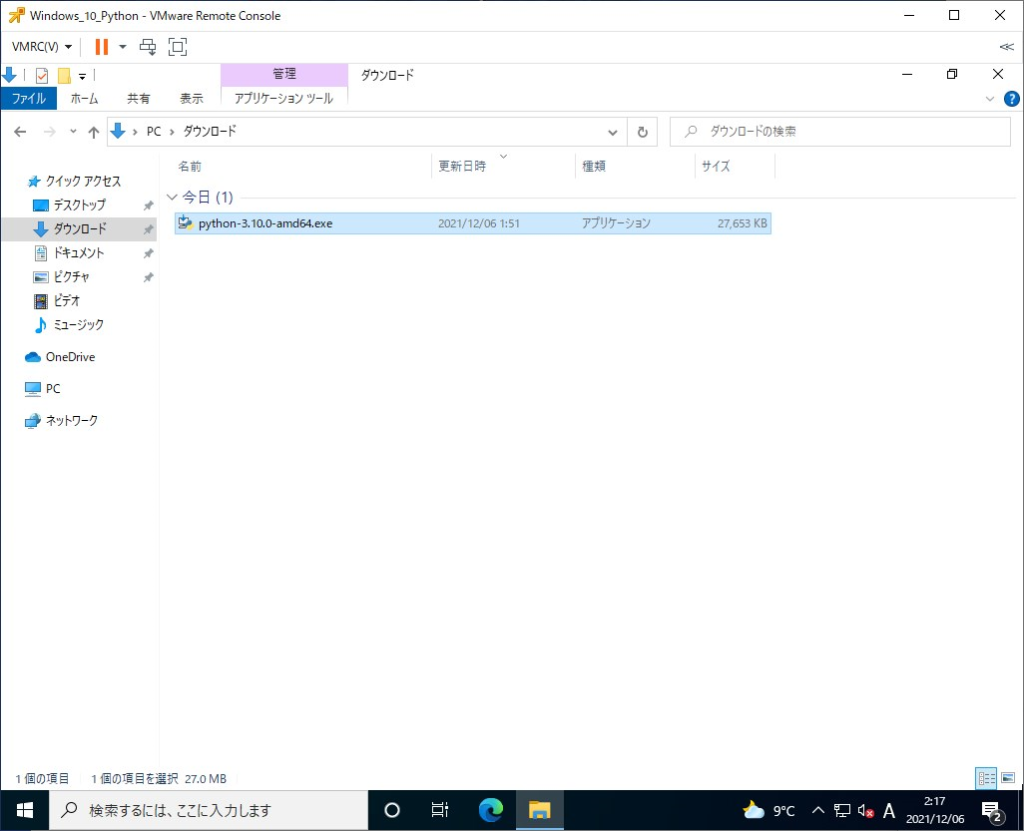
『python-x.x.x-amd64.exe』がダウンロードされたことを確認します。
ダウンロードしたファイルをダブルクリックして実行します。
Pyrhonのインストールウィザードが開始されます。
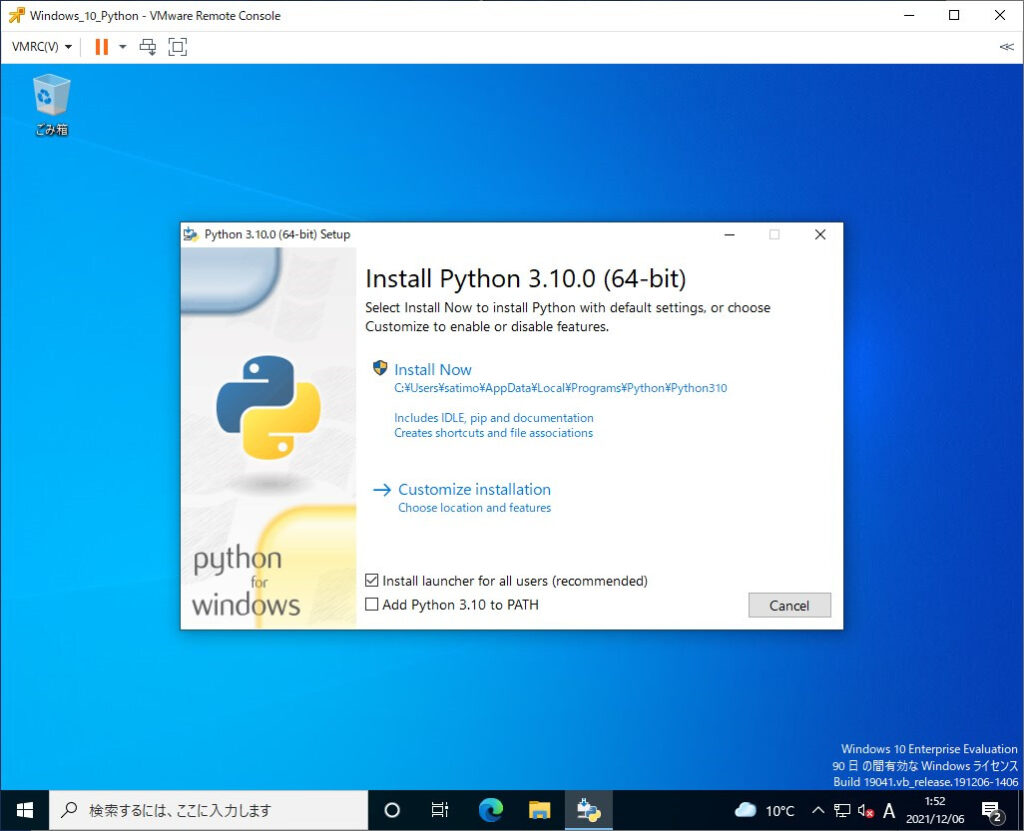
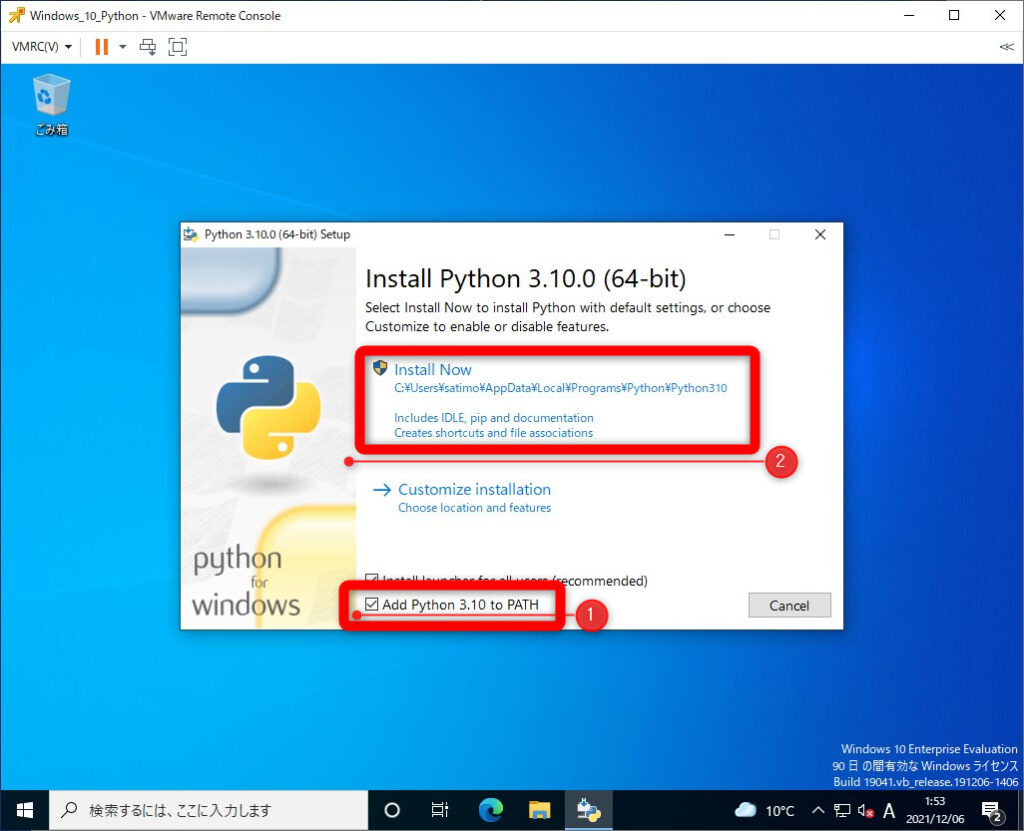
始めの画面で『Add Python x.x to PATH』にチェックを入れます。
チェックを入れたことを確認し『Install Now』をクリックします。
- 『Add Python x.x to PATH』にチェックを入れる
- 『Install Now』をクリックする
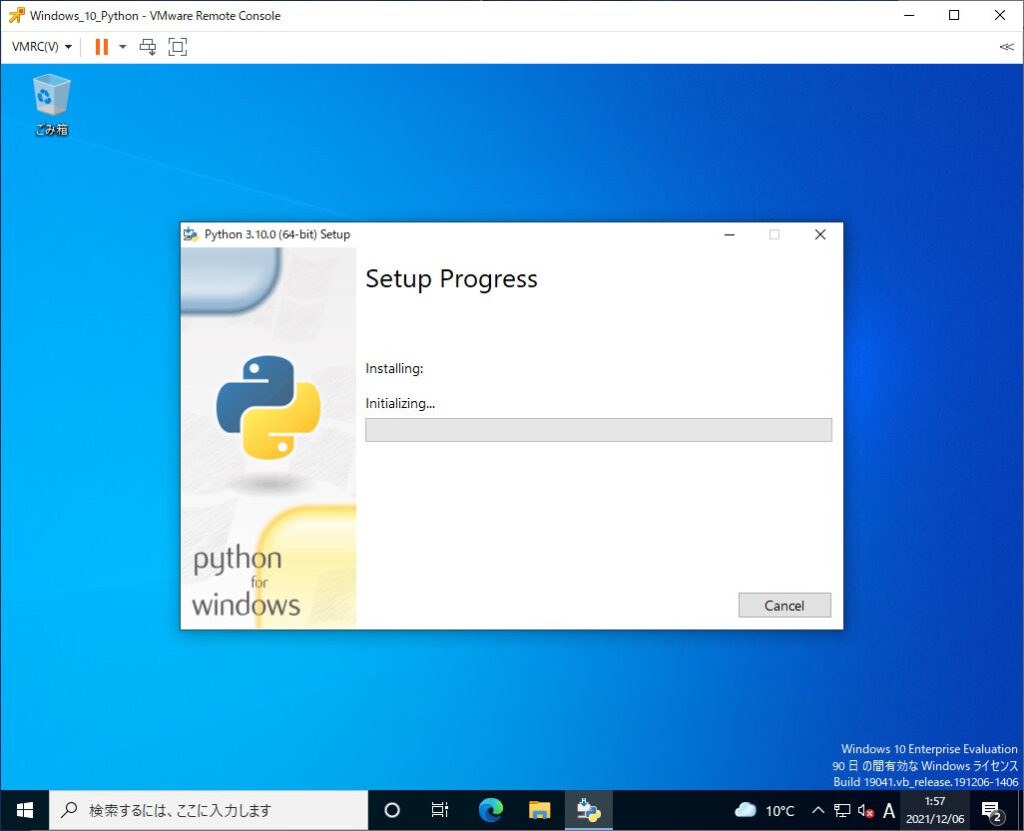
インストールが開始されます。
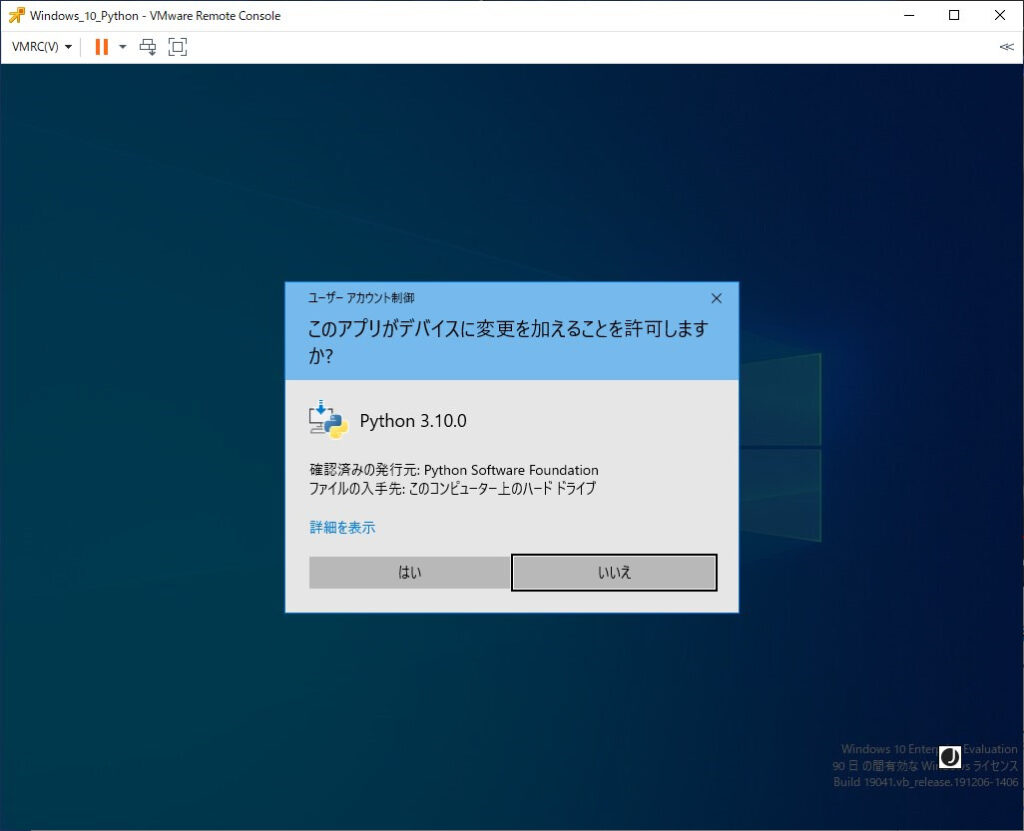
Windowsの設定によっては「ユーザーアカウント制御」の画面が表示されます。
表示された場合は『はい』をクリックしてインストールを続けます。
インストールが続行されるのでしばらく待ちます。

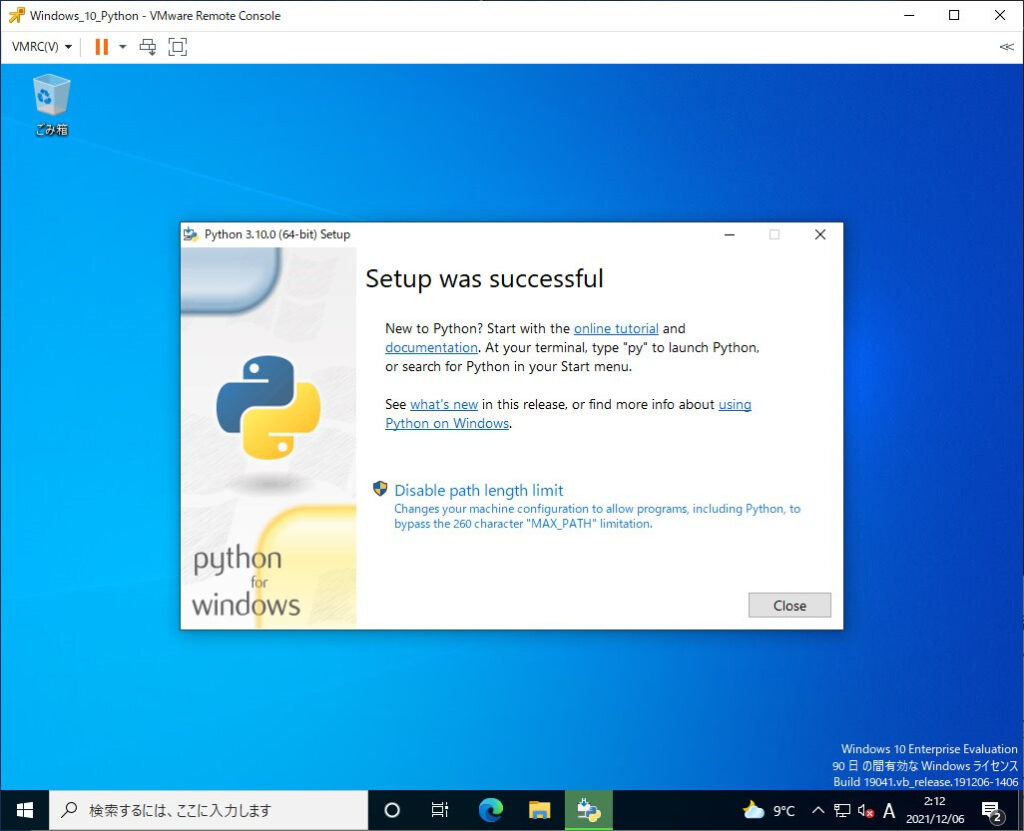
「Setup was successful」の画面が表示されればインストール完了です。
『Close』をクリックしてインストールウィザードを終了します。
正しくインストールされたの確認を行います。
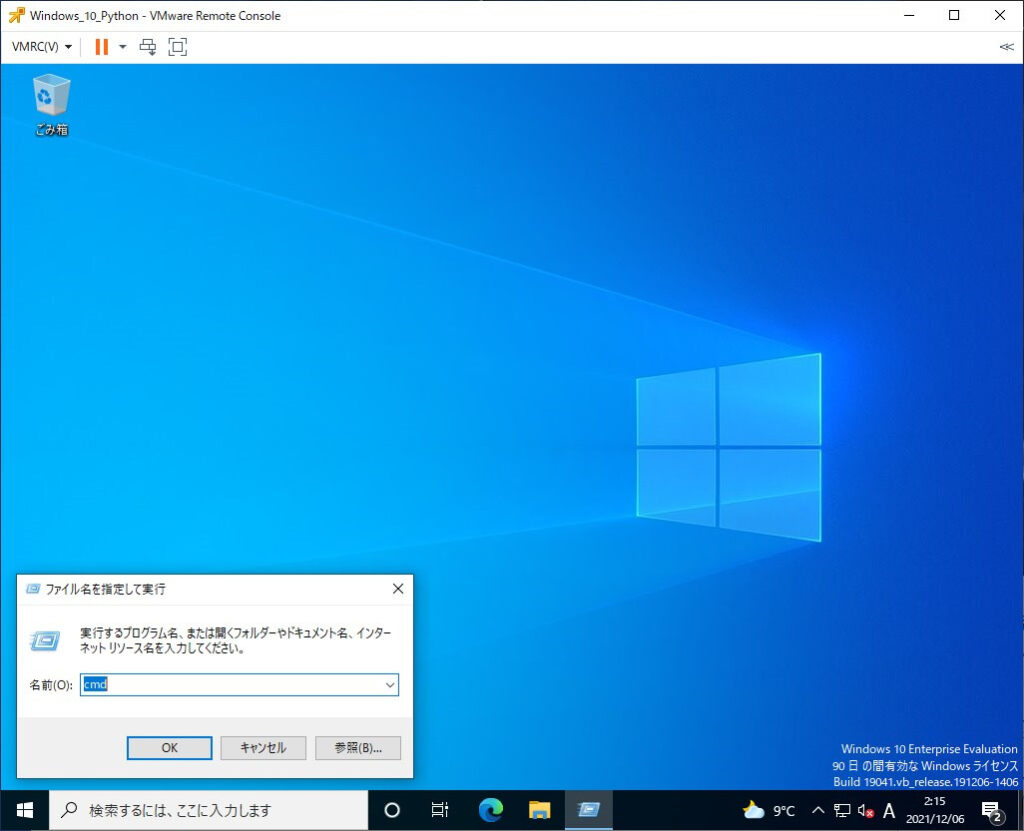
『Windows キー』と『r』を同時に押して「ファイル名を指定して実行」の画面が表示されます。
「名前」の項目に『cmd』と入力し『OK』をクリックします。
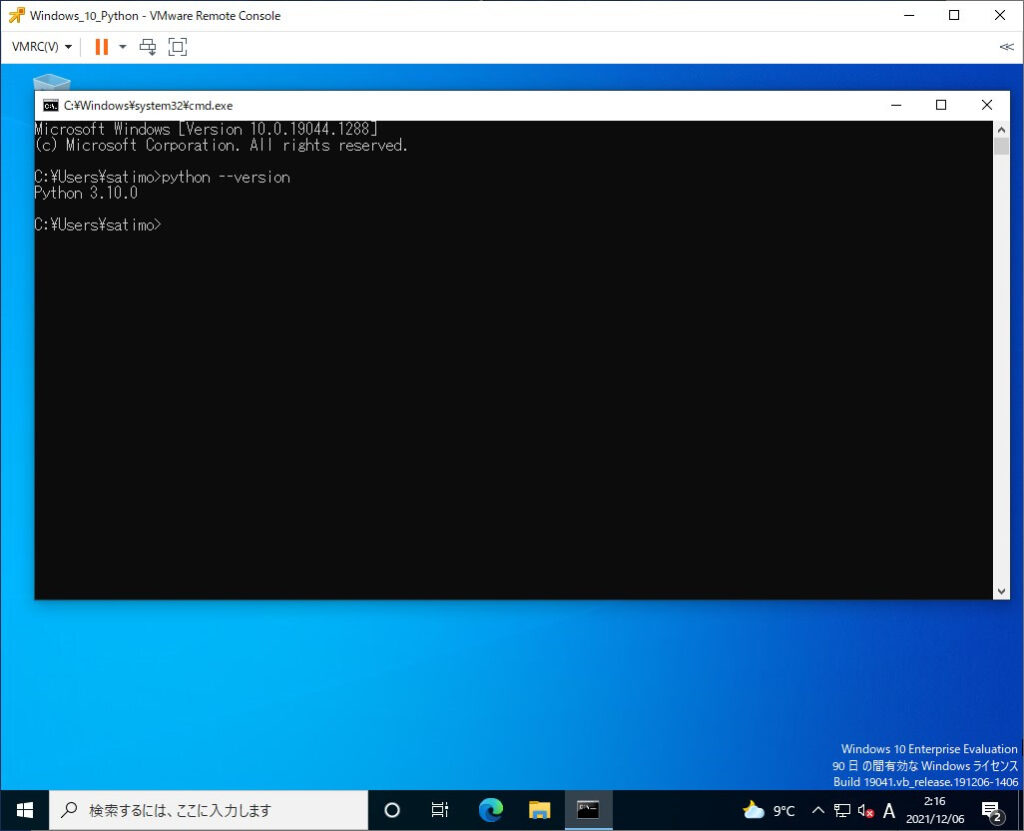
コマンドプロンプトの画面が表示されます。
「python –version」と入力し『Enter』をクリックします。

インストールしたPythonのバージョンが表示されればOKです。
アンインストール
最後にお片付け(アンインストール)の手順を紹介します。
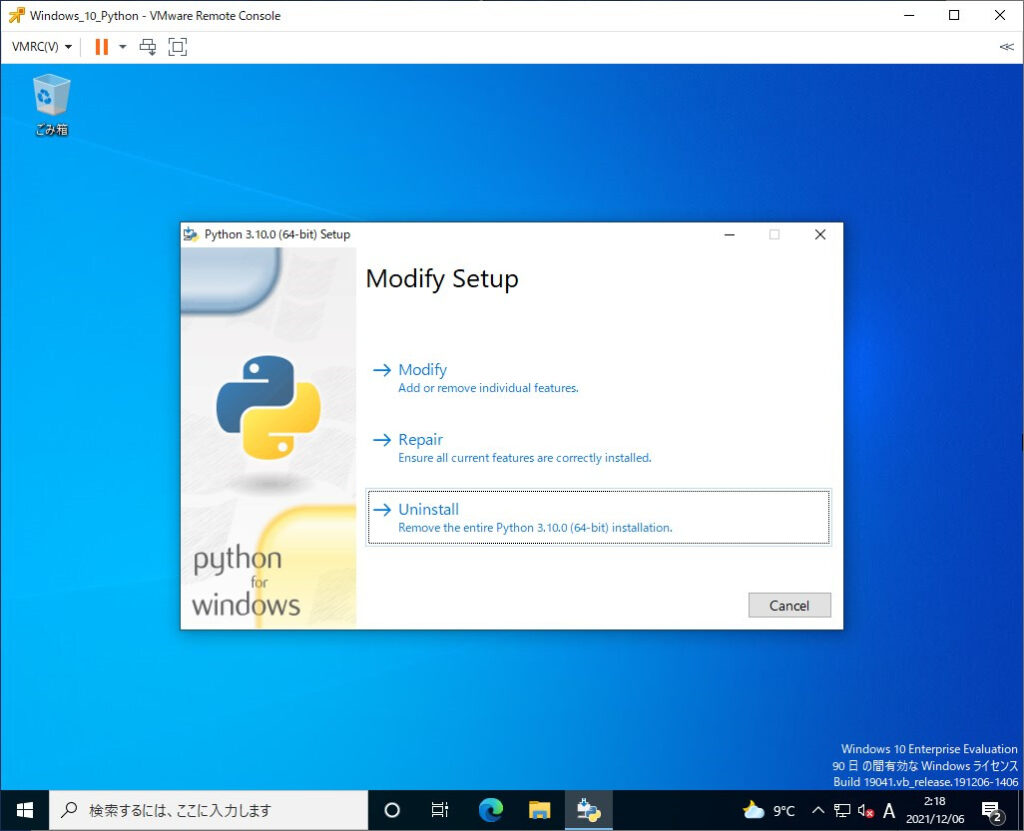
ダウンロードしたファイル「python-x.x.x-amd.exe」を実行します。
Pythonのインストールウィザードが表示されます。
『Uninstall』をクリックします。

アンインストールが開始されますのでしばらく待ちます(-。-)y-゜゜゜

「Uninstall was successful」と表示されればアンインストール完了です。


コメント